There are seven steps in the panelized construction process.
Step One - Foundation and floor system
The foundation is prepared by your local contractor before our panelized package arrives on site. There are several types of foundations for you to consider; slab on grade (pre-engineered concrete), full depth basement, crawlspace or pier foundation.
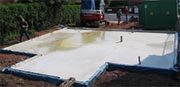
Slab on Grade

In areas where basements are not common or required, a concrete slab is a common alternative. Concrete slabs require local engineering to account for soil conditions. Walls can be easily anchored to the slab using poured-in-place anchors, chemical or mechanical fasteners. A foam gasket is used between the bottom plates and the concrete in order to prevent moisture wicking into the wall panels.
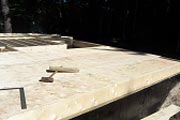
Full Basement/Crawlspace
Full Basements and Crawlspaces are essentially the same except for height. A full basement is typically eight feet (or more) in height whereas a crawlspace is usually four feet. After the foundation is complete, the sub-floor is installed before any wall panels are installed. The sub-floor process starts by installing any required columns, beams and sill plates. Next the floor joists, boxing and sheathing are installed. This brings the house to the point where it is ready for the first floor walls.
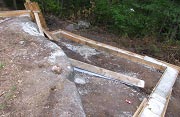
Pier Foundation
Pier foundations rely on a series of piers and beams to carry the load of the house. With a pier foundation a sub-floor is installed first before any wall panels. The process begins by installing the beams required to carry the sub-floor. The floor system follows with the floor joist, boxing and sheathing. This brings the house to the point where it is ready for the first floor walls.
Step Two - First Floor Walls
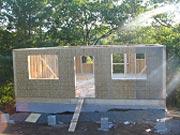
All of our panels are shipped on pallets and therefore can be easily placed on or near the sub-floor or slab. The panels are manageable in size and can be easily handled by one or two people.
A chalk line is used to mark out the first floor walls on the sub-floor (or slab on grade) according to the wall layout drawings. Each wall panel is then lifted in place and then secured to the sub-floor and tied together on top with a double plate. Exterior walls do not need to be squared because the panels come squared from the factory. The house is now ready for the second floor sub-floor or the roof depending on design.
 Step Three - Second Floor System
Installing the second floor is the same process as the first floor. Bearing beams and columns are installed first and then followed by the sub-floor.
Note: The floor system can be made up of regular dimensional lumber or pre-engineered floor joists.
 Step Four - Second Floor Walls
Wall panels can be boomed to the second floor individually or pallet at a time depending on panel size and layout.
Second Floor walls are installed in the same manner as the first floor walls. Walls are marked out on the sub-floor and then erected in according to the layout drawings. Walls are anchored to the sub-floor and tied together on top with a double plate. The house is now ready for the roof system.
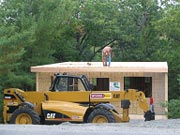
Step Five - Roof System
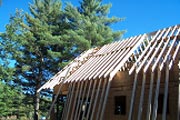
Depending on roof design, the roof system may be pre-engineered trusses or rafters and ceiling joist (or a combination of both). The roof system is installed according to construction drawings or truss layouts. After the roof system is finished the structure of the house is now secure and all bracing that was previously installed to stabilize the walls can be removed.
Step Six - Exterior Finish
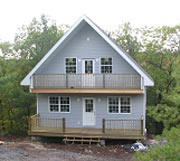
When the structure is complete the exterior finishes can be installed to make the house secure and watertight. Finishes will vary depending on design and customer choice.
While these finishes are being installed, trades can start the rough in of the electrical, plumbing and HVAC system.
With wood panels roughing in services is simple; there are no special fasteners or supplies required, as with other systems.
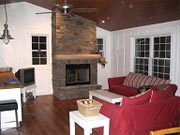 Step Seven - Interior Finish
After services and the HVAC system has been roughed in, walls can be insulated and wallboard can be installed. Particular finishes will vary inside the home depending on customer choice.


